
Create a T-Shirt with Mapbox Studio
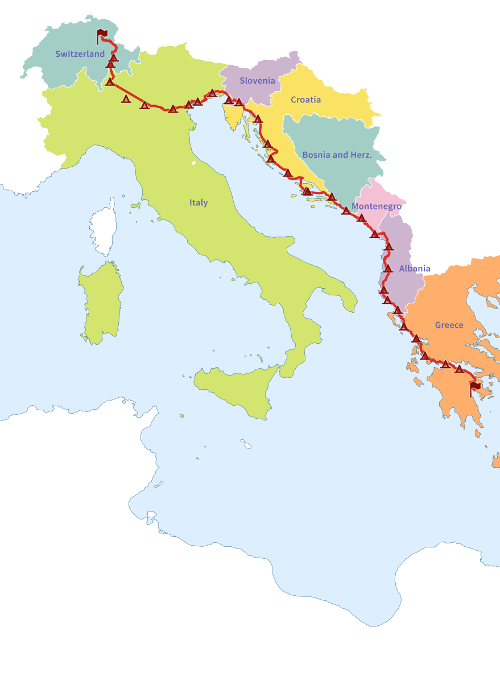
In summer of 2015 a good friend and I did a biketour from Switzerland to Greece across the Balkan states. The entire tour was GPS tracked and as a special memory of this experience I wanted to create a T-shirt out of the data of our journey. You can find the project on Github.
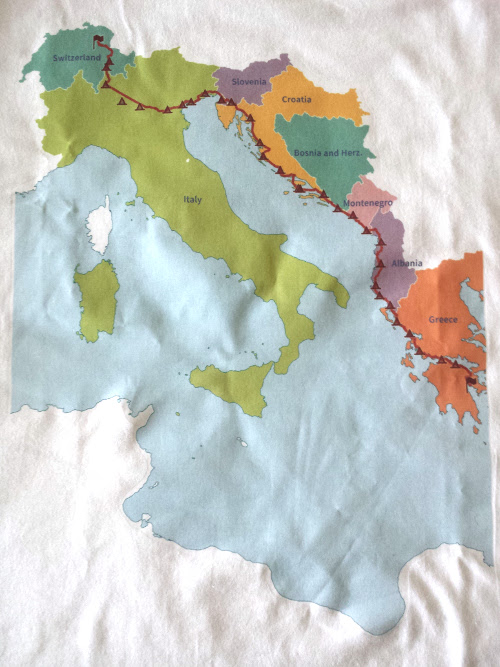
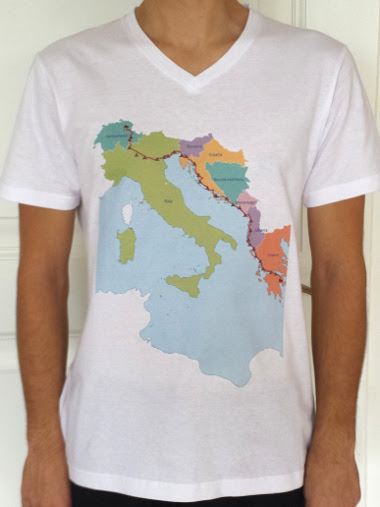
Result
On the left you see the scaled down export from Mapbox Studio and on the right the printed T-shirt in comparison. The print accuracy is surprisingly good. The colors don’t match exactly though.
Tutorial
Choose a good Base Map
You don’t want too many features printed on your chest. Choose a base map with good contrast and customize it to show only the features you want. Especially the stylistic base maps will probably yield good results.
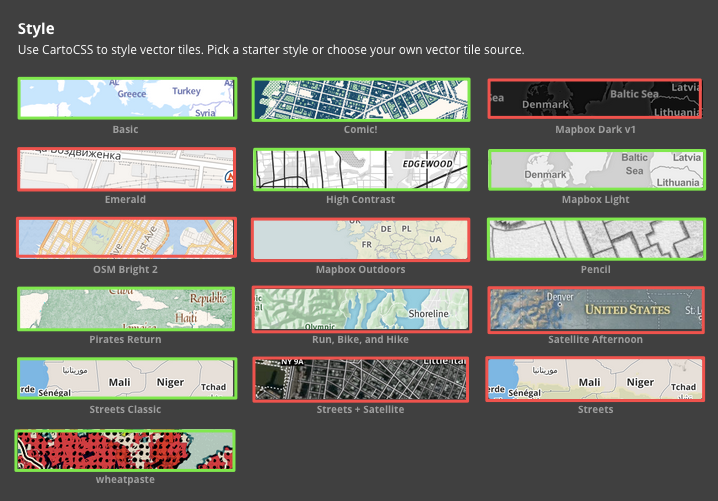
In my case I chose a completly different basemap based on the Mapbox Geography Class Example. You can clone the Mapbox Studio project repository from here.
Create a custom source
Create a new source and import your data. You can import GPX traces or in my case I used GeoJson files. Just make sure you have enough attributes to style the data later.
In the style project you now have to combine the two sources.
In Layers > Change Source enter the Mapbox id of your basemap layer followed
by the id of your custom source layer. You should now see the layers of both sources
in your style project.
Adapt Styles
Transparency
Make the base layer of your map transparent. If you cannot make it transparent (e.g. if your base layer is your water body) then assign white color for features you want to make transparent later in the image post-processing step.
Map {
    background-color: transparent;
}
Customize
Remove any clutter on the map you don’t want to see. CartoCSS supports filters to explicitely hide or show feature layers. In my case I only wanted to show countries I actually travelled and hide the rest.
#country-name {
    text-name: ''; // Hide the label for all countries

    // Show label for specific countries
    [ADM0_A3='CHE'] { text-name: [NAME]; }
    [ADM0_A3='ITA'] { text-name: [NAME]; }}
}
Because you are optimizing for a single zoom level to export an image you can optimize the position of the labels by hand.
[ADM0_A3='GRC'] {
    text-dy: -18;
    text-dx: -23;
}
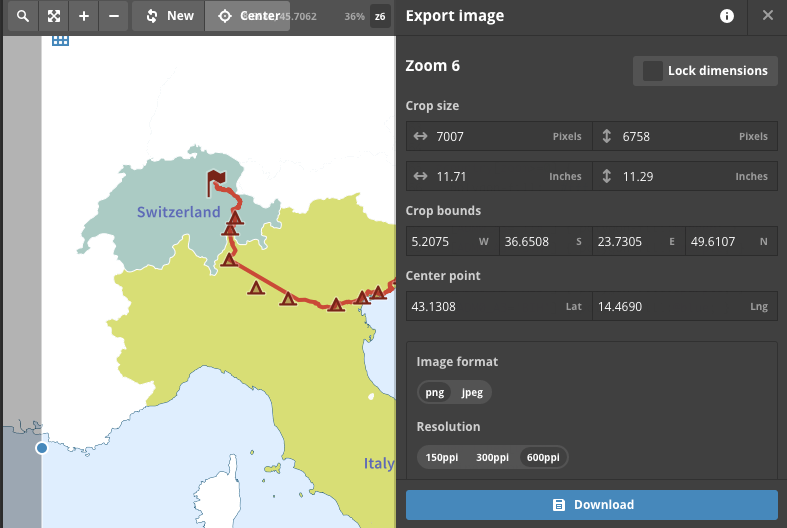
Export image
Now you need to export the image.
Choose the highest possible resolution 600ppi and the PNG format.
Post-processing with GIMP / Photoshop
Now make sure that your map background and edges are transparent. In my case I chose white as the base layer color and then replaced white with the alpha channel. If your map is transparent it will also be possible to print it on different T-shirt colors.
Create the T-shirt
Alot of parameters depend on your T-shirt manufacturer. Most online printing services allow you to upload a high resolution image and preview the result in the browser. I used the swiss T-shirt printing service Mc Shirt but there are alot of providers out there: just do a quick Google search.
I am quite happy with the print result and service although the T-shirt quality does feel a bit lousy.

Conclusion
Creating something physical out of virtual data is a really fun task and the resulting T-shirt is a good memory and conversation starter.
Key Takeaways
- Export in the highest possible resolution
- Choose few colors
- Make the map transparent
- Optimize the map for one zoom level
- Choose thick T-shirt quality