
Install CoreOS on CloudStack
Docker is amazing and a project that brings Docker to its logical conclusion is CoreOS, a very light-weight Linux distribution, where all applications are installed and run using Docker. I wanted to try out CoreOS on a Apache Cloud Stack based IAAS provider. While CoreOS provides many different installation methods, they missed out on CloudStack.
This is a short tutorial how to install CoreOS on a CloudStack provider and create a reusable CoreOS template.
Booting the CoreOS image
The easiest way to install CoreOS is using an ISO to bootstrap the installation.
Register CoreOS ISO
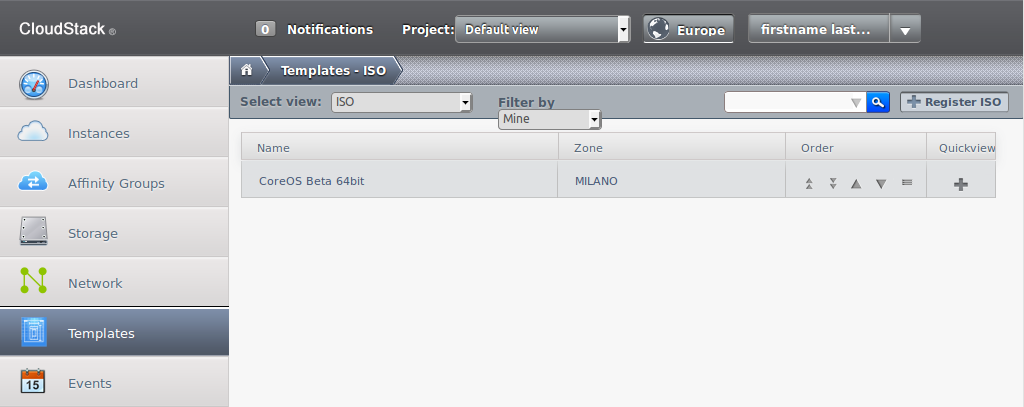
Visit the CoreOS ISO installation page and copy the link for the latest beta ISO. Now go to templates, select the ISO view in the dropdown and register a new ISO.
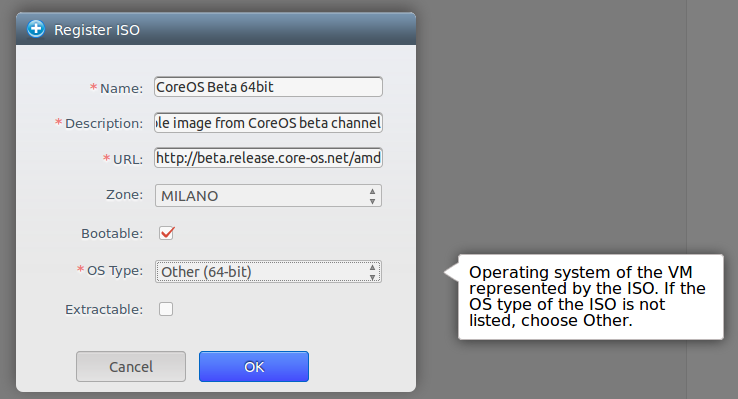
CoreOS is only meant to be installed on 64bit machines and it is crucial that you choose Other (64bit) as OS Type. Don’t use Other Linux (64bit) because this will fail when booting from the ISO. Make sure you’ve selected Bootable and paste the previously copied link to the ISO in the URL field.
Now you should see your newly created ISO.
Booting the ISO
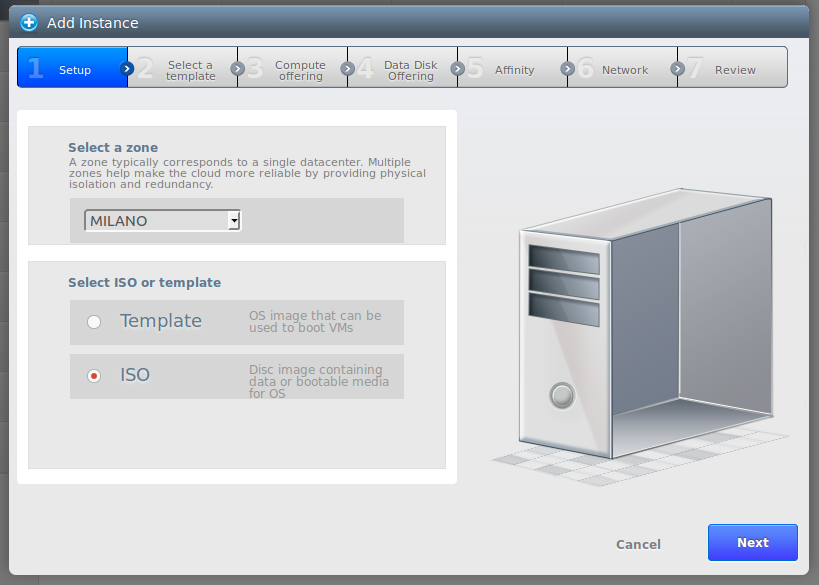
Let’s create an instance and attach that ISO to it. You have to choose ISO as a template.
Note: A CloudStack template is meant to bootstrap a new server with an Operating System that is prepared to run on CloudStack (for example by using the CloudStack tools to reset the root password) while an ISO is booted with tools like PXE and lets you do stuff like install an Ubuntu Server or rescue data.
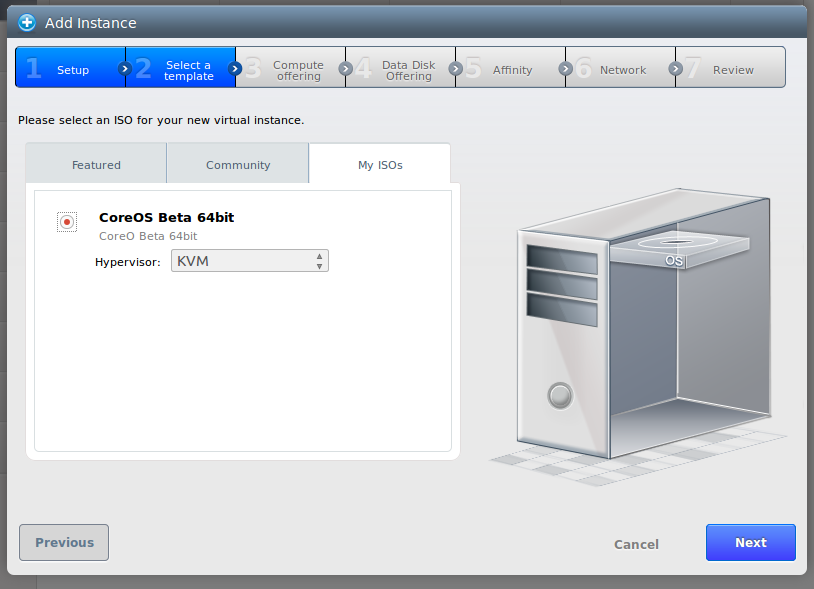
Now select your registered ISO. If it does not appear yet, you might have to reload the page and restart the wizard.
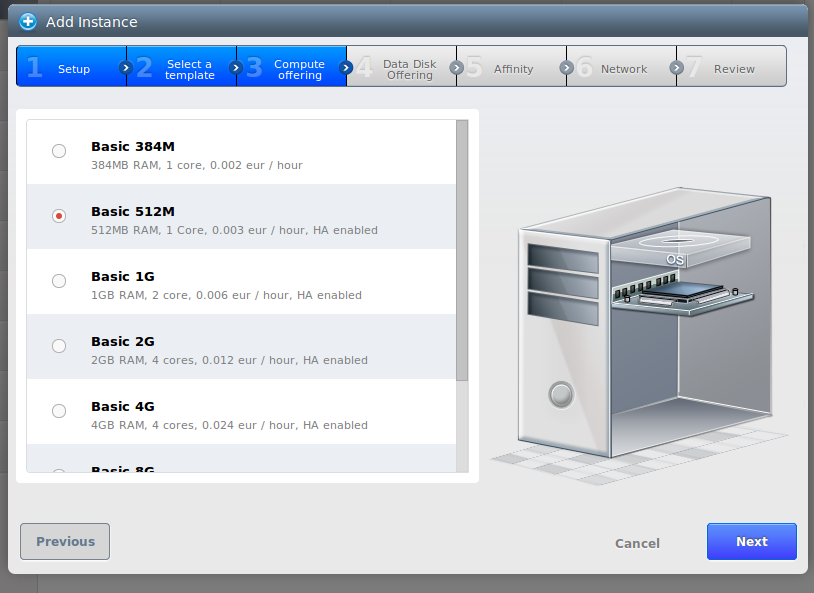
Make sure to select at least 512 MB Ram to boot the image. I’ve tried with 360 MB and it does not seem to work.
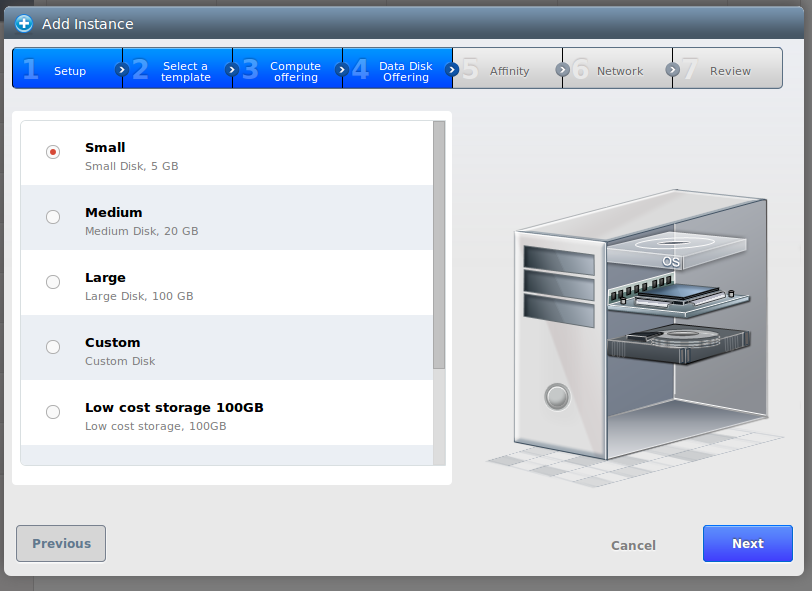
The disk size you choose now is for the root image we install CoreOS too. Because CoreOS is a very slim operating system 5GB does suffice.
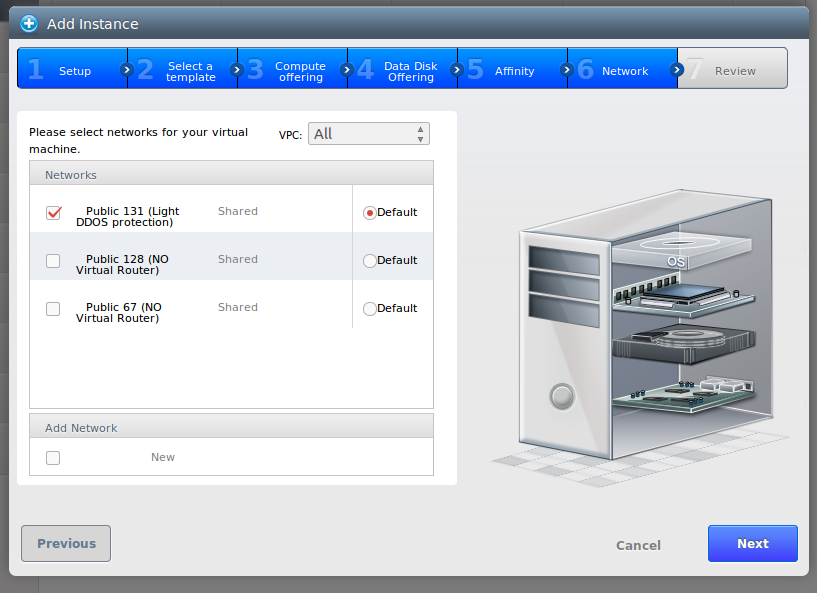
Now select your instance network. You need access to the servers of CoreOS to pull down the image, so you have to connect to network with access to the internet.
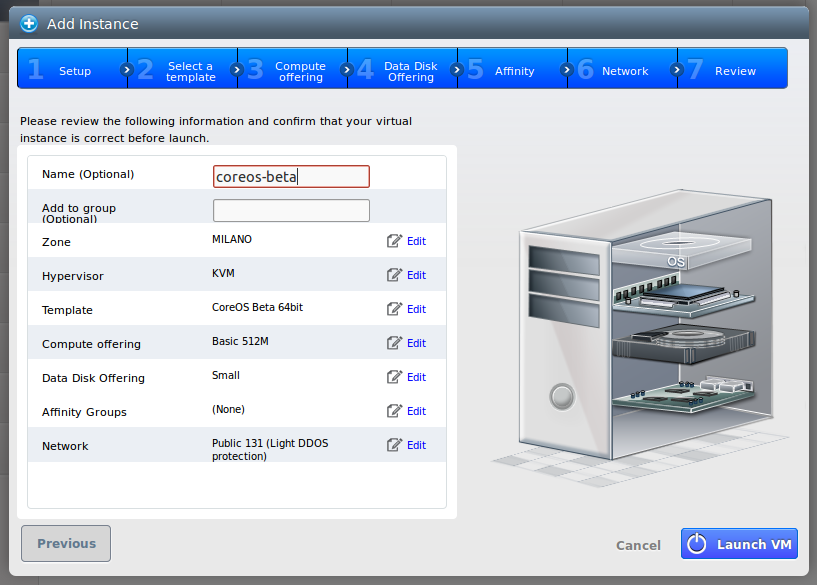
Set a good hostname and ramp up the VM!
Now connect with the web console (because you won’t get SSH with the CoreOS image) and check network connectivity.
Installing to Disk
This step is analogous to what is described in the CoreOS docs. Because we’ve booted the CoreOS image we have everything needed to install CoreOS to disk.
Now the first thing we have to do is creating a cloud config. This is executed at first start and if you don’t create one you won’t be able to login in via the web console or connect via SSH. Cloud config is the CoreOS version of cloud init (used by OpenStack and AWS) and only implements a subset of cloud init’s functionalities.
In the cloud config you have to define how you want to authenticate. The easiest way to get started is you either use your Github SSH keys to authenticate or specify the SSH key explicitly.
Setup SSH Authentication
Because you can’t paste something in the CloudStack web console the most comfortable option is to simply import the SSH fingerprints of your Github Account.
Create a cloud-config.yaml file:
#cloud-config

users:
  - name: deploy
    coreos-ssh-import-github: lukasmartinelli
    groups:
      - sudo
      - docker
The first line #cloud-config is required so don’t leave it out. Below users you can define the users to create on the system (I always use a special deploy user) and set the coreos-ssh-import-github option along with your Github user name.
If you need root access for your CoreOS installation, you should add your user to the sudo group below groups.
You can also restrict access to a single SSH Key and then login with the core user:
#cloud-config

ssh_authorized_keys:
  - ssh-rsa AAAAB3NzaC1yc2EAAAADAQABAAABAQDPF+tdQM.....Xds3 me@lukasmartinelli.ch
You can find more information about adding users in the offical CoreOS documentation.
Install with coreos-install
Now let’s bootstrap the installation on the attached disk /dev/sda:
sudo coreos-install -d /dev/sda -C beta -c cloud-config.yaml
This will install everything needed on the primary storage of that VM. You can also specify to use the CoreOS alpha channel with -C alpha.
Detach and reboot
After coreos-install has succeeded, stop the instance and afterwards detach the ISO.
If we restart the VM it now uses the newly created disk as a boot image. Connect to the web console to inspect the state and you should be prompted with a login.
Connect
Because you added your Github keys you should be able to connect with any of your machines you used with Github before. You’ll find the IP of your machine under the NIC section of the running instance. If you specified a user in the cloud config you should connect with this user.
ssh deploy@188.164.131.234
If you explicitly set a SSH key use the core user.
ssh core@188.164.131.234
If you are not happy with your cloud config you can tweak it at /var/lib/coreos-install/userdata.
Create a template
If everything is set, stop the VM. Now go to Storage and select the disk of your stopped VM. In the quick actions you can now select Create template.

Again, select Other (64bit) and don’t check Password Enabled unless you’ve installed the necessary scripts.
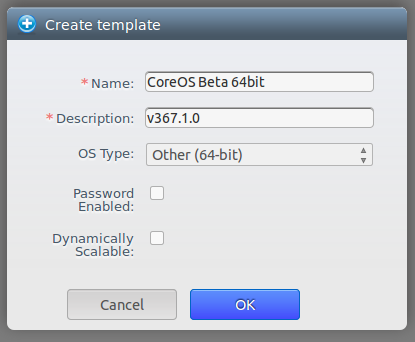
Now you have a usable template to kickstart your new CoreOS VMs.
Conclusion
Now that you have installed CoreOS you should dive deeper into its documentation. It quickly get’s clear that you need to provide a better way to configure the cloud config instead of SSHing into the machine and configure it by hand. You could for example use a config drive that you manage yourself.