
Transfer Hosted Zone between AWS accounts
A guide how to transfer a AWS Route53 hosted zone and domain from one AWS account to another.
Transfer Domain
First you need to ask the AWS support to transfer your Domain domain.com from the current AWS account 79a5-CURRENT-5125 to the
future AWS account 949e-FUTURE-1238. Find the AWS account identifiers
of both accounts and follow the instructions from the official AWS documentation.

This can take ~1hr after which you should be able to see the transferred domain in Route53 > Registered domains.
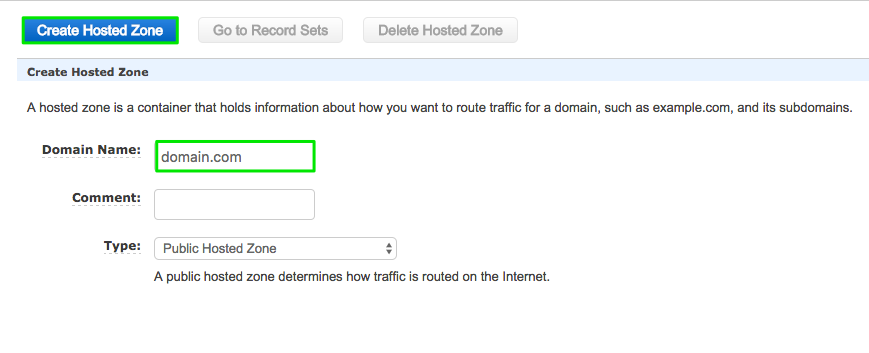
Create new Hosted Zone
On the future AWS account 949e-FUTURE-1238 create a new hosted zone for the transferred domain domain.com.
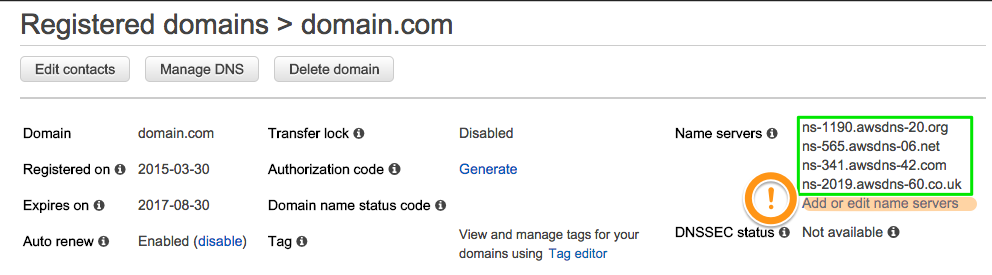
Copy the nameservers listed in the NS record of the newly created zone. Additional background information about NS records and Route53 can be found in the AWS Migration Guide.

Now change the nameservers in the previously transferred domain domain.com to the nameservers listed in the created hosted zone.
Migrate Records
AWS provides no built-in way of transferring the records from one hosted zone to another. Luckily the cli53 tool allows dumping a zone file of an existing hosted zone. We can then import this zone file into our new hosted zone.
Head over to the cli53 repository and install the tool.
If you don’t have your AWS access credentials yet go to IAM and create a user
on your old account 79a5-CURRENT-5125 and give it permissions to access Route53.
Once you can access your hosted zone dump the zone file of your domain domain.com.
cli53 export --full domain.com
The dumped zone file will contain all the records of your old hosted zone.
Make sure you remove all entries of record type AWS since this is not an officially supported type for the zone file.
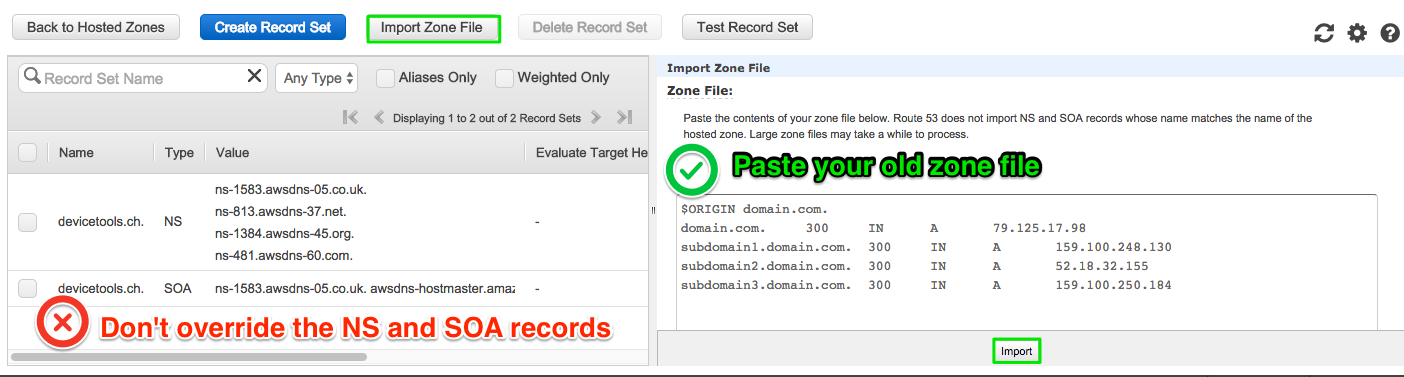
Also remove the SOA and NS records of the zone file since it is absolutely crucial that we don’t override
the SOA and NS records of the new zone.
$ORIGIN domain.com.
domain.com.	300	IN	A	79.125.17.98
subdomain1.domain.com.	300	IN	A	159.100.248.130
subdomain2.domain.com.	300	IN	A	52.18.32.155
subdomain3.domain.com.	300	IN	A	159.100.250.184
Now copy your trimmed down zone file and import it into the new created zone.
Wait and remove the old Hosted Zone
Don’t rush and delete the old hosted zone right away. Wait a few days until the new nameservers are fully propagated and you have tested that everything works. Only then remove the old hosted zone from your old account.